[restored from my Wordpress blog]
Over the past months I’ve spent some time working with Janet the UK’s National Research and Education Network. As well as managing the operation and development of the Janet network, Janet runs a number of services for educationand research including operating eduroam(UK), the UK part of a large, global network established between all sorts of research and education facilities and institutions.
In addition to eduroam and other services, one of the most important projects Janet is leading is the development and standardization of an open platform for authentication, authorization and trust management based on existing standards:
This platform is called Project Moonshot.
Simply put, Moonshot in conjunction with FreeRADIUS is an identity provider and a security token service. Nevertheless it is primarily based on the protocols mentioned above – EAP, RADIUS and GSS-API/SSPI/SASL instead of WS-Federation, OAuth or SAML-P (although one of the token formats supported by Moonshot are SAML tokens).
What I personally think is really cool about Moonshot!?
The really cool and practical thing by being built on the protocols above, is in my personal opinion, that those protocols are supported by almost all relevant operating system platforms deeply integrated since these standards are also used by Kerberos. For example Windows as an OS has SSPI deeply built into the logon-process of Windows which means with an SSPI-provider for Moonshot, the Windows logon itself can be sourced from a federation through a variety of trust-relationships instead of the OS or a direct domain controller by itself. That is one thing that is not possible with the commonly more widely known standards such as WS-Fed, OAuth or SAML-P since they’re all web-focused.
Why is Moonshot so important for Microsoft and Windows Azure?
Independent of what I think the advantages are of Moonshot, the most important part for Microsoft and Windows Azure is, that Moonshot plays THE central role of authentication, authorization and establishing trust communities in research and academia in UK and also around the world. It is currently becoming THE prime mechanism for establishing research communities, building up trust relationships between them and thus allowing federated authentication and authorization for research projects across the world.
In other words: if Windows Azure wants to play an important role in research in the future, Moonshot needs to be somehow supported in Azure as a platform. Through our partnership and work with Janet we achieved a first step for this over the past months, together!
Moonshot IdP Base Image on VMDepot…
Working together with Janet we managed to get a base-image prepared, tested and published on Microsoft Open Technologies VMDepot that can be used by anyone who wants to get connected to research communities through Moonshot Trust Routers and IdPs for federated security.
You can find this image here on VMDepot for getting started.
Although it seems like a simple thing to do, we had to undergo a few steps to get this far. Moonshot was required to be updated to support the Linux-distributions officially supported on Windows Azure. Furthermore we had to test if the semantics of the protocols used, especially EAP, do work well on Windows Azure. At least for single VM deployments we did this and the image above on VMDepot contains all the bits with which we’ve tested.
Of course that’s just the first step and we know we need to take some future steps such as making the deployments ready for multi-instance deployments for the sake of high availability and eventually also performance. Nevertheless, this is a great first step which was required and enables us to move forward.
The image by itself is based on Ubuntu Linux 12.10 LTS, it has the Moonshot and FreeRADIUS package repositories configured correctly and has other useful packages installed that are required or nice to have for Moonshot and FreeRADIUS (such as “screen” for example).
Using the Moonshot/FreeRADIUS VMDepot Image
Next I’d like to summarize how you can make use of the Moonshot VMDepot image. Note that most probably you should be involved in academia or research projects for this to be useful to you . Of course you can also setup your own, single IdP using the image, but the full power gets unleashed when you become part of the Janet Trust Router network which is what I am focusing on in this blog post right now.
Let’s start with a few assumptions / prerequisites:
- Assumption #1: Since the primary target group is academia and research which is very Linux-focused, I am assuming people who’re trying this will most probably try the steps below from a Linux-machine. Therefore I am only using tools that also work on Linux (or Mac), although I am running them from a Windows machine.
- Assumption #2: For the steps to complete you need an active Windows Azure subscription. To get one, navigate to www.windowsazure.com and click on the “Free Trial” button in the upper, right corner.
- Assumption #3: You are able to get in touch with Janet for getting credentials required to connect your Moonshot IdP/RP to their Trust Router network and that way become part of the larger UK and global academia and research community implementing Moonshot.
Now let’s get started with the actual deployment of a Moonshot VM based on the image Janet and we have published together on VMDepot:
-
Install Node.js if on your machine if not done, yet. Node.js is needed since the Windows Azure Cross Platform Command Line Interface which we will use for setting up the Azure environment is built with Node.js.
-
Install the Windows Azure Cross Platform Command Line Interface (xplat CLI). The Azure xplat CLI is a command line interface that allows you to script many management operations for services in your Azure subscription from either a Linux, Mac or also a Windows machine. For more details on setting it up, please refer to the Azure xplat CLI homepage.
- Import your Windows Azure Subscription Publish Profile Settings through the xplat CLI.
Before you an issue any operation to your Azure subscription in the cloud through the xplat CLI, you need to download and import a credentials file. This is the only operation that requires a GUI with a web browser, so if you issue the following command, you should sit on a machine with x-Windows installed or be on a Mac or Windows machine. Open a shell-window or a command prompt and execute the following command:
- azure account download This will open a web browser and browse to a page where you’ll need to sign-in with the account that has access to your Azure subscription (your Microsoft account with which the subscription has been created or which is a Co-Admin of another subscription). It results in the download of a “xyz.publishsettings”-file which contains the credentials. Save that file to your local disk. Next execute the subsequent command:
- azure account import
path & filename to xyz.publishsettings. This command finally makes the Azure xplat CLI aware of your credentials. After that step you can finally start with true management commands against your subscription. - Note: if you have multiple Windows Azure subscriptions, you also need to select the subscription in which you want to create the VM using azure account set
subscription-id.
- Create a virtual machine image based on our VMDepot base image using the xplat CLI.
Finally we can create the Virtual Machine based on the VMDepot image. For this purpose execute the following command in your previously opened shell:
- azure vm create yourdnsprefix -o vmdepot-28998-1-16 -l “North Europe” yourusername yourpassword –ssh
- This command creates a VM which will get a public DNS-name called “yourdnsprefix.cloudapp.net” through which you then can connect to your VM (e.g. via SSH).
- The result of issuing the command should look similar to the following:
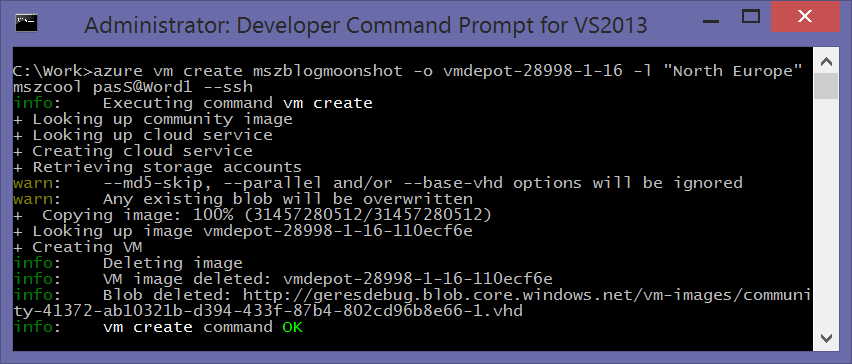
- What you see here is that the script transfers the template for the virtual machine from VMDepot with the VMDepot image id 28998-1-16 to your storage account and then creates the VM from that template. Finally it does some clean-up stuff.
- Last make sure Moonshot/FreeRADIUS and SSH endpoints are open on the Azure firewall.
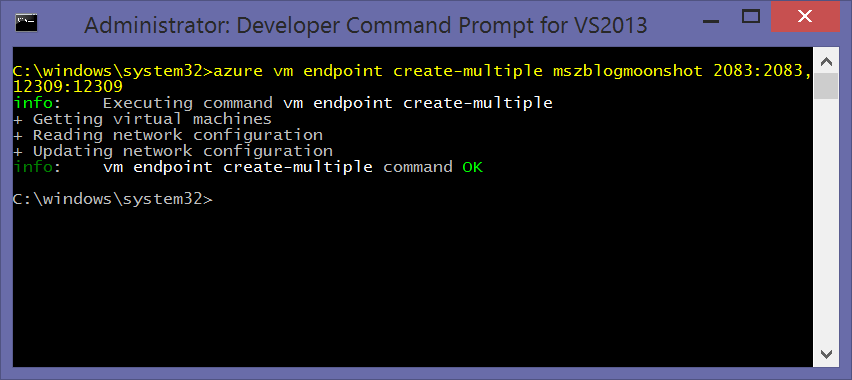
The last step is to open up the required TCP-endpoints on the Azure firewall. This can happen after the VM has been created successfully. Ports required are 2083 and 12309 for Moonshot/FreeRADIUS, SSH is open by default on 22 given our previous command including the -ssh switch. Issue the following commands:
- azure vm endpoint create-multiple DNS_PREFIX 2083:2083,12309:12309
- The result should look similar to the following (note that I’ve added port 22 before, already, therefore you won’t see it in the screenshot):
After you’ve completed those steps and the VM has been created, successfully, you need to connect to the VM and perform the final Moonshot/FreeRADIUS-configuration steps. These are pretty much the same as those you’d need to do on an on-premise machine in your own data center, we’ve prepared anything in that image in a way that it should work smooth in Azure.
-
SSH into the newly created VM. Make sure you connect as root so you can perform all administrative tasks. All subsequent steps are to be executed in that SSH-session to your newly created VM!
- Update to the latest package versions.
Since the image is Ubuntu-based, use apt-* to update to the latest version of the packages. Issue the following commands:
apt-keyLook for the Moonshot keys and see if they’re still valid. If not, download the latest from the Moonshot repository and import them using the following commands.wget http://repository.project-moonshot.org/debian-moonshot/key.gpgcat key.gpg | apt-key add -
apt-updateapt-upgrade
- Update the FreeRADIUS certificate files to match your organizational values.
As part of the bootstrapping process, Moonshot and FreeRADIUS generate certificate files required for setting up trust relationships between your RP/IdP and other RP/IdPs. These are generated through openssl based on settings-files prepared in the bootstrap-image from VMDepot. You should customize those to match your organizational values, for example such as the common name to be used for your organization and IdP. Perform the following steps:
- Switch to the directory /etc/freeradius/certs.
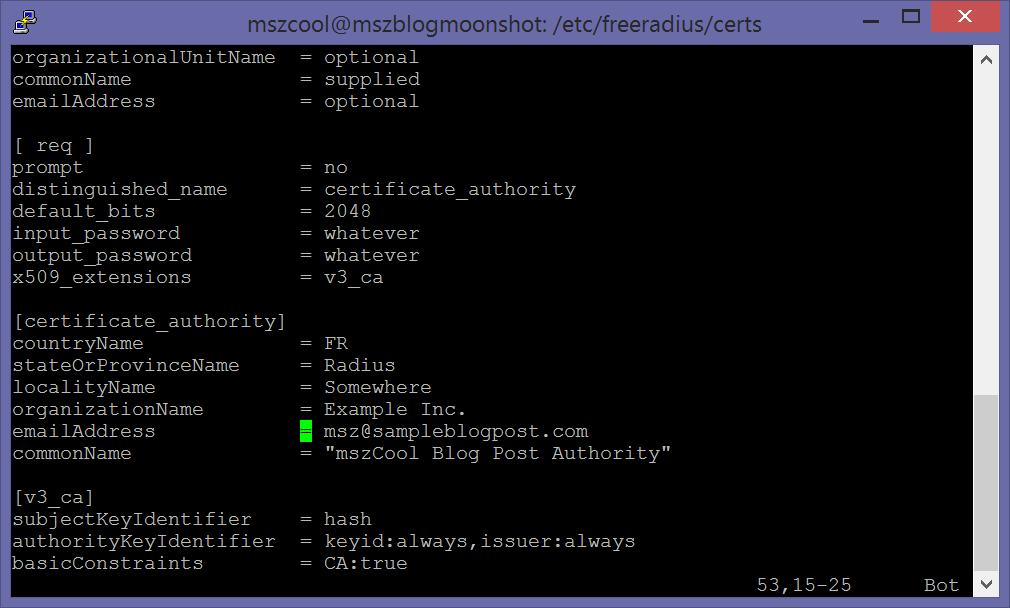
- Open the file ca.cnf and update the following values to match your own values:
- emailAddress
- commonName
- It should look similar to the following if you’re using VI, if you’re really taking it serious, then also update the other values (e.g. passwords for private key files):
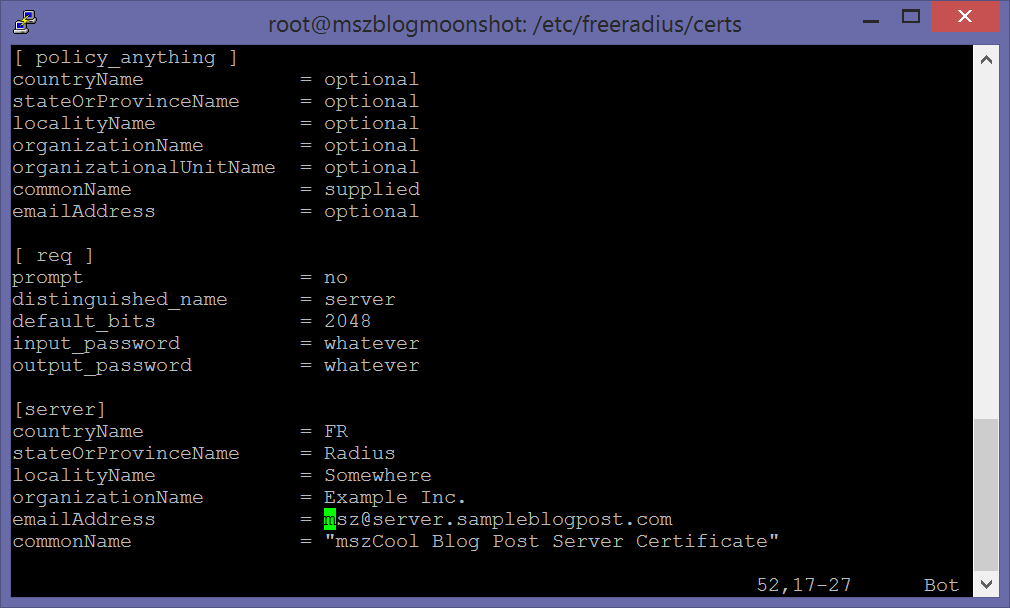
- Open the file server.cnf and update the following values to match your own values:
- emailAddress
- commonName
- It should look similar to the following if you’re using VI:
- Finally update the same values also in the file client.cnf to match your own values:
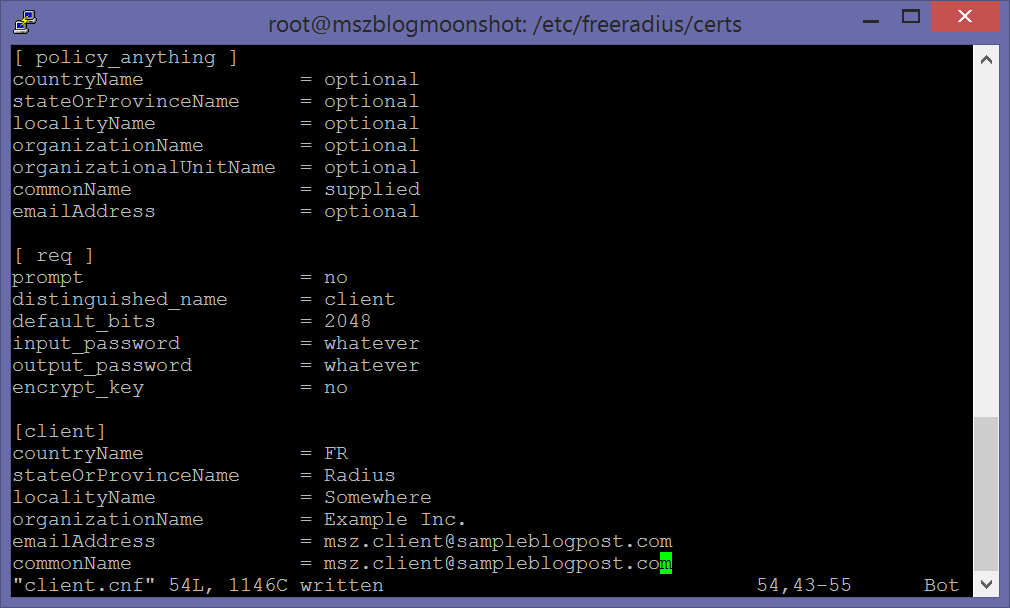
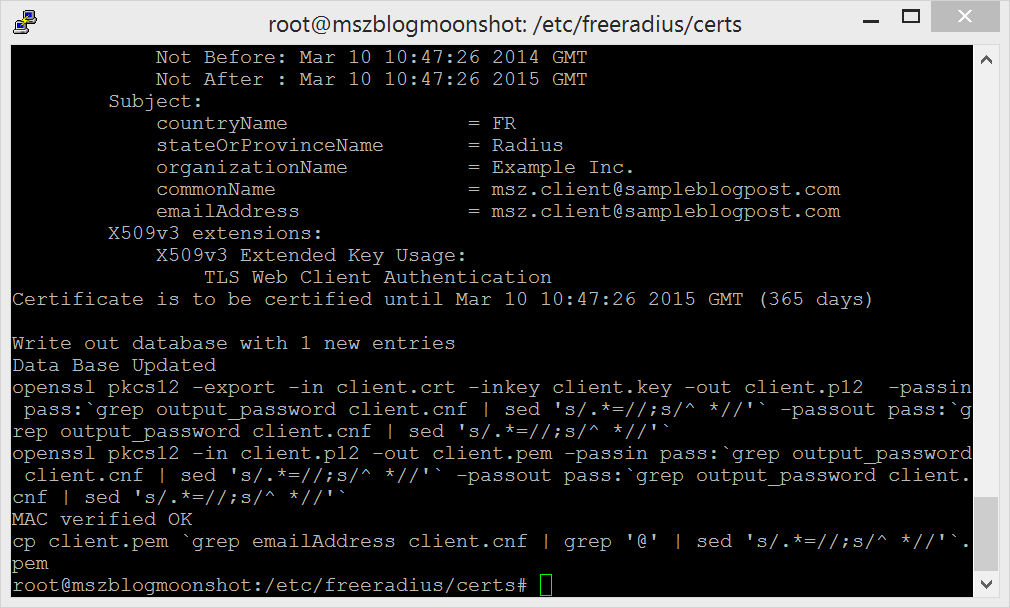
- Execute the command sudo /etc/freeradius/certs/bootstrap. This produces a lot of output, but at the end your screen will look similar to the following after executing this command:
- Fine-tune Client Private Key Files:
Next you need to “fine-tune” the private key files for the clients. This is supposed to be something that will be fixed/made easier in future versions of Moonshot and FreeRADIUS. Perform the following steps:
- Change to the directory /etc/freeradius/certs.
- Run the following command: cat client.crt client.key > client.txt
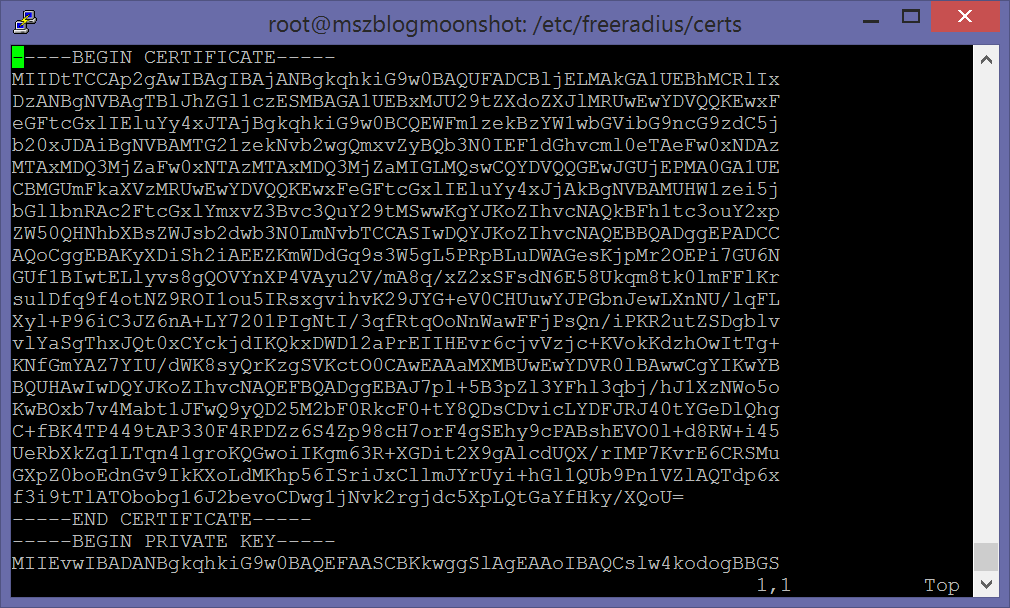
- Now overwrite client.key with client.txt by executing the following command: mv client.both client.key
- Open client.key in VI and delete all lines until the first —- BEGIN CERTIFICATE —- appearance as shown below:
- Realm configuration – Part #1
Now that all certificates are configured, you need to configure your “realm”-settings such as the name of your realm and other options Moonshot and FreeRADIUS allows you to set. For this blog-post we keep it with the simple creation of a realm for your setup.
- Switch to the directory /etc/freeradius.
- Open the file proxy.conf in VI and add the following section anywhere in the file:
realm yourrealm.com
{
}
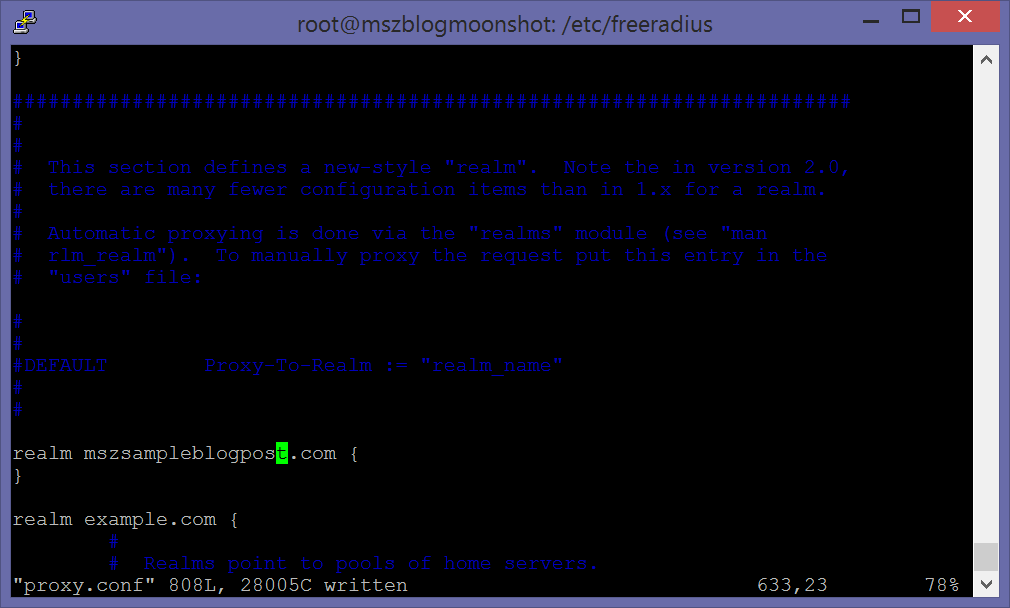
- The realm you select should match the DNS-name you’re planning to use for setup. This DNS-name should then be mapped using a DNS CNAME-alias or DNS A-Record to your xyz.cloudapp.net setup in Azure.
- You can look at the sample-realm configurations in the file so that you can decide which other options you’d prefer to set for your setup. For this post we keep things at a default-setup.
- Realm configuration – Part #2
For the next realm-setting perform the following steps in the SSH-session:
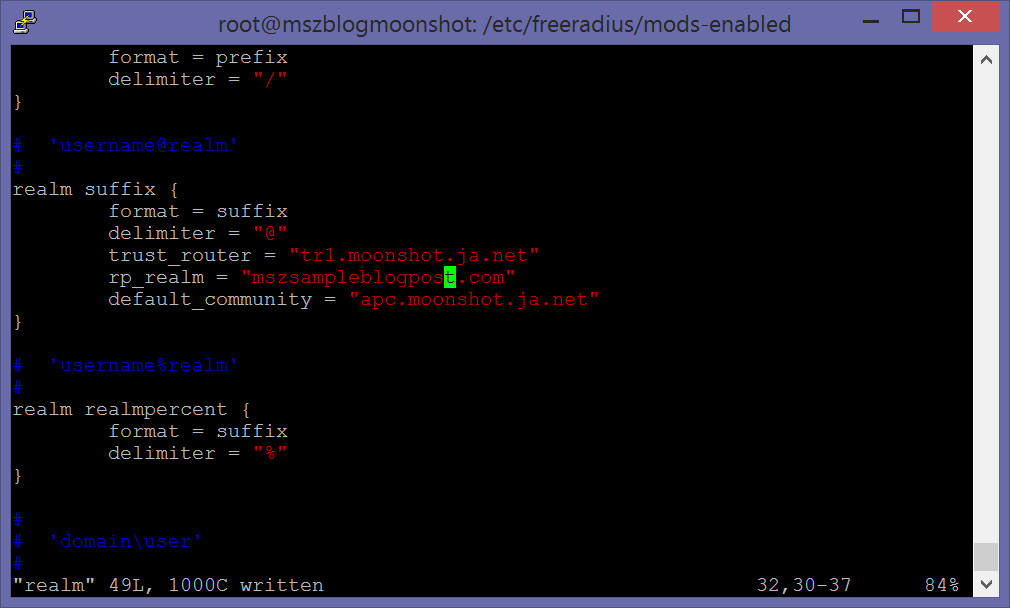
- Open the file /etc/freeradius/mods-enabled/realm in VI for editing.
- Add the following section at any place in the file: realm suffix { change rp_realm = “yourserver.yourrealm.com” }
- Make sure you use the same domain-name as before (e.g. yourrealm.com) and that the name you specify here (yourserver.yourrealm.com) is a resolvable DNS-name.
- The results should look similar to the following:
- Modify post-authentication step that issues the SAML assertion.
Next you need to modify the post-authentication steps. One action that happens in those post-authentication steps is the definition of SAML-assertions that get issued as a token after a successful authentication. We prepared the image with a default-template that you can customize based on your need. But even if you don’t customize the assertions, there’s one step you need to complete and that’s bringing your realm into the context of the post-authentication steps.
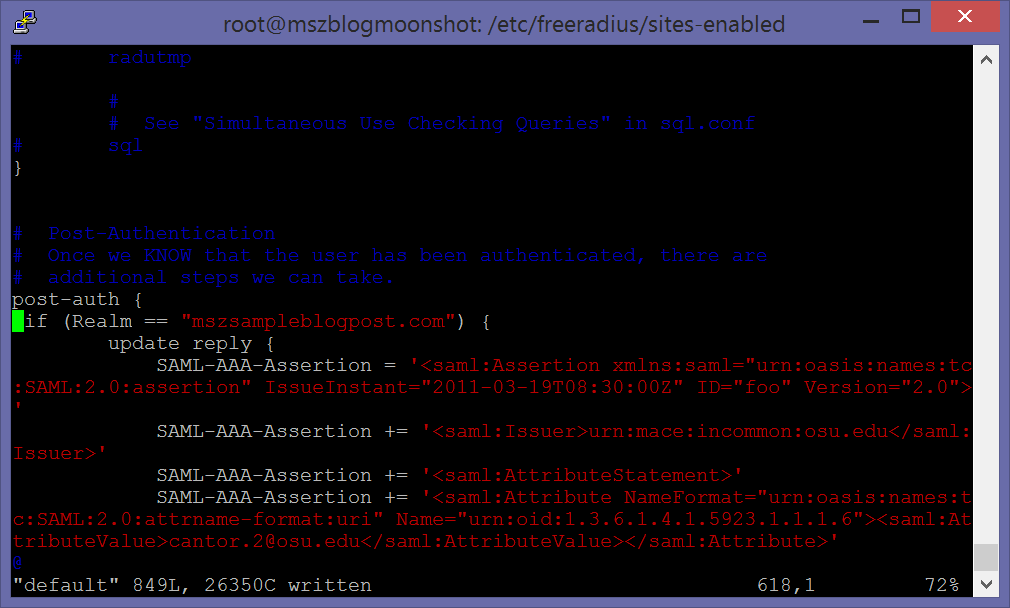
- Open the file /etc/freeradius/sites-enabled/default with VI.
- Search for a configuration section starting with post auth { … }.
- Modify it to issue the SAML-assertion for your realm as follows: post-auth { if (Realm == LOCAL) … change to if (Realm == “cloudapp.net”) (same as above) }
- The result should look similar as the following:
- Request and setup Trust Router Credentials (through Janet).
As mentioned most use of a Moonshot/FreeRADIUS install is given when you connect it to a research community. For this purpose get in touch with Janet to join their pilot via https://www.ja.net/products-services/janet-futures/moonshotOnce accepted onto the pilot, Janet will send you Trust Router credentials which allow you to get into a federation with the research network Janet operates.
- Janet (or other Trust Router operators) will send you the trust router credentials for setting up the trust relationship as an XML file. Put that XML-file on your Moonshot VM created earlier.
- Next execute the following commands (assuming the XML-file with the Trust Router credentials is called mytrustcreds.xml):
- su –shell /bin/bash freerad
- unset DISPLAY
- moonshot-webp -f mytrustcreds.xml
- With those credentials your IdP/RP will be able to connect and federate with the Trust Router network Janet operates for academia and research (or the one you’ve received the credentials for).
Finally that’s it, we’ve completed all steps for configuring the Moonshot/FreeRADIUS setup. Now it’s up to test the environment or start using it for your single-sign-on and authentication purposes. A simple test for your environment together with Janet could look as follows:
- Open up three terminal sessions to your Moonshot/FreeRADIUS VM you just created.
- In Terminal #1 perform the following steps:
- Open /etc/freeradius/users using VI.
- Look for the following line: testuser Cleartext-Password := “testing”
- Leave it for the test or modify it as per your needs. Also that’s where you could add your own users of your IdP. If you leave it as above that’s the credentials you can use for testing.
- Now execute the following commands:
- su –shell /bin/bash freerad (runs a shell under the FreeRADIUS user)
- freeradius -fxx -l stdout (runs freeradius for debugging with logging to stdout)
- In Terminal #2 perform the following steps:
- moonshot-webp -f
- tids
trustrouter@apc.moonshot.ja.net /var/tmp/keys - The external IP for your Azure VM is visible in the Azure Management portal (manage.windowsazure.com) for your virtual machine.
- trustrouter@apc.moonshot.ja.net is an example for a trusted trust router. In case you federate with Janet, that’s most likely the one you’ll use.
- moonshot-webp -f
- In Terminal #3 perform the following step:
- tidc tr1.moonshot.ja.net {your rp-realm} apc.moonshot.ja.net apc.moonshot.ja.net
- Important Note: for the commands above to succeed, you need to have valid Janet Trust Router credentials and Janet needs to have your IdP/RP configured in their trust-settings as a trusted party! Otherwise later when executing the tidc-command the test will fail!
- Finally to complete the test someone needs to use Moonshot and its identity selector on a client machine to authenticate using your IdP. The best way to do that is using the LiveDVD for Moonshot provided by Janet.
That’s it, now you have your Moonshot / FreeRADIUS IdP to get yourself connected with a huge community of researchers, scientists and students across the world… for further questions it’s best to get in touch with the people from Janet and Moonshot via moonshot-community@jiscmail.ac.uk. And go to the Moonshot home page to find more details here: