At SAP Sapphire we announced the availabiltiy of SAP HANA on Azure. My little contribution to this was working on case that was shown as a demo in the key note at SAP Sapphire 2016: Sports Basement with HANA on Azure. It was meant as a show-case and proof for running HANA One workloads in Azure DS14 VMs and it was the first case of HANA on Azure productive outside of the SAP HANA on Azure Large Instances.
While we proved we can run HANA One in DS14, what’s still missing is the official Marketplace image. We are working on that on-boarding of HANA One into the Azure Marketplace at the time I am writing this post here. This post is about a very specific challenge which I know is needed by many others, as well. While Azure will have a built-in solution, it is not available, today (August 2016), so this might be of help for you!
Scenario: A VM reading and modifying data about itself
This is a very common scenario. HANA One needs it as well. On other cloud platforms, especially AWS, a Virtual Machine can query information about itself without any hurdles through an instance metadata service. On Azure, as powerful as it is, we don’t have such a service available, yet (per August 2016). To be precise, we do, but it currently delivers information about regular maintenance, only. See here for further details. While such a service is in the works, it is not available, yet.
Instance metadata is especially interesting for software providers which want to offer their solutions through the marketplace. The metadata can be used for various aspects including association and validation of licenses or protection of software assets inside of the VM.
But what if a VM needs to modify settings through Cloud Provdier Management APIs, automatically? Even with an instance metadata service available, such requirements need a more advanced approach.
Solution: A possible approach outlined
Based on that I started thinking about this challenge, prototyping it and sharing it with the broader technical community. With Azure having the concept of Service Principals available, I tried the following path:
- If we could pass in a Service Principal at the creation of the VM, we’d have all we need to call into Azure Resource Manager APIs.
- The VM can identify itself through it’s “Unique VM ID”. So we could query into Azure Resource Manager APIs and find the VM based on this ID.
- For Marketplace use cases it is necessary, that the user is FORCED to enter the credentials. So an ARM template with mandatory parameters for passing in the details for the Service Credential is needed.
With this in place we can solve both problems with a single solution: with the right permissions equipped, a Service Principal can query instance metadata through Azure Resource Manager APIs and modify virtual machine settings at the same time. Indeed, the Azure Cloud Foundry Bosh solution uses that approach as well, although it does not need to “identify” virtual machines. It just creates and deletes them…
For most Marketplace Vendors incl. the case above, the VM needs to change details about itself. So their would need to be a way for the VM to find itself through the VM Unique ID. Since nobody was able to answer the quesiton if that’s possible, I prototyped it with the Azure CLI.
Important Note: This is considered to be a prototype to proof if what is outlined above generally works. For production scenarios you’d need to code this in professional frameworks, better protect secrets by using those and build this into your product.
GitHub Repository: I’ve prototyped the entire solution and published it on my GitHub Repository here:
–» https://github.com/mszcool/azureSpBasedInstanceMetadata
Step #1: Create a Service Principal
The first step is creating a Service Principal. That is not an easy task, especially when you think about offerings in a Marketplace where business people want to have fast and simple on-boarding.
Guess for what I’ve created this solution-prototype on my GitHub repository (with a blog-post followed). The idea of this prototype is to provide a ready-to-use service that creates Service Principals in your own subscription.
I still run this on my Azure Subscription, so if you need a Service Principal and you don’t like scripting, just use my tool for creating it. Note: please use in-private browsing and sign-in with a Global Admin (or get a Global Admin who does an Admin-Consent for my tool in your tenant).
If you love scripting, then you can use tools such as the Azure PowerShell or the Azure Cross Platform CLI. In my prototype, I built the entire set of scripts with the Azure CLI and tested it on Ubuntu Linux (14.04 LTS). Even cooler, I indeed developed and debugged all the Scripts on the new Bash on Ubuntu on Windows:
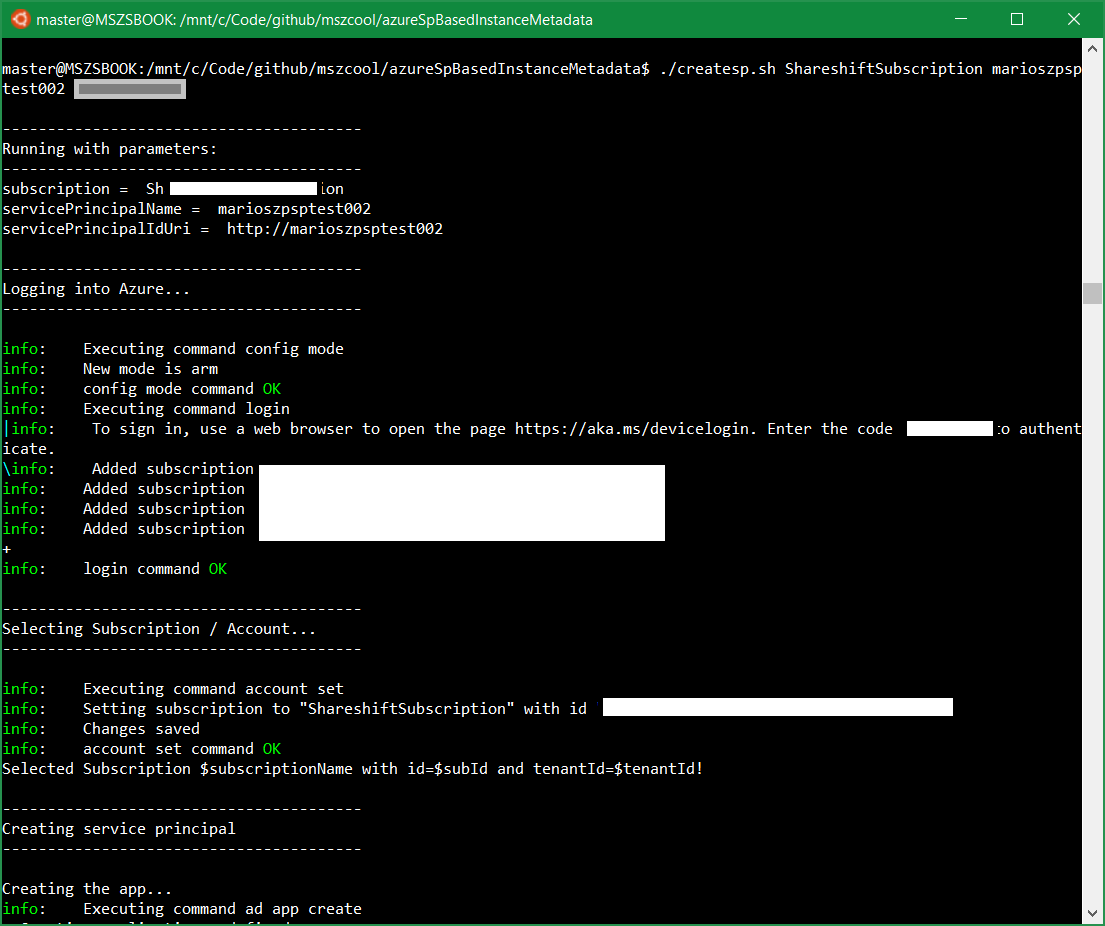
The script createsp.sh shows a sample-script which creates a Service Principal and assigns the needed roles to the Service Principal to read VM metadata in the subscription (it would be better to just target the resource group in which you want to create the VM… I just kept it like that for convenience).
# Each Service Principal in Azure AD is backed by an 'Application-registration'
azure ad app create --name "$servicePrincipalName" \
                    --home-page "$servicePrincipalIdUri" \
                    --identifier-uris "$servicePrincipalIdUri" \
                    --reply-urls "$servicePrincipalIdUri" \
                    --password $servicePrincipalPwd

# I use JQ to extract data out of JSON results such as the AppId
createdAppJson=$(azure ad app show --identifierUri "$servicePrincipalIdUri" --json)
createdAppId=$(echo $createdAppJson | jq --raw-output '.[0].appId')

azure ad sp create --applicationId "$createdAppId"
Note: I created the App and the Service Principal separately since the AppID is needed to login using Azure CLI with the Service Principal, anyways. Therefore I separated those steps since I needed to read the App and the Service Principal Object IDs, anyways.
Note: JQ is really a handy command line tool to extract data from the neat JSON-responses of the Azure CLI. Take a look at further details here.
After the Service Principal and the App are both created, I can assign the roles to the Service Principal so that he can query the VM Metadata in my subscription:
# If I would create the resource group earlier, I could use the
# --resource-group switch instead of the --subscription switch here to scope
# permissions to the resource group of the VM to-be-created, only.
azure role assignment create --objectId "$createSpObjectId" \
                             --roleName Reader \
                             --subscription "$subId"
Finally, to complete the work, I needed the Tenant ID of the Azure AD Tenant for the target subscription which is also needed for the Login with a Service Principal with the Azure CLI. Indeed the following code-snippet is at the very beginning of the createsp.sh-Script:
# Get the entry for the target subscription
accountsJson=$(azure account list --json)

# The Subscription ID is needed throughout the script
subId=$(echo $accountsJson | jq --raw-output --arg pSubName $subscriptionName '.[] | select(.name == $pSubName) | .id')

# Finally get the TenantID of the Azure AD tenant which is associated to the Azure Subscription:
tenantId=$(echo $accountsJson | jq --raw-output --arg pSubName $subscriptionName '.[] | select(.name == $pSubName) | .tenantId')
With those data-assets above in place, the tenantId, the appId and the password selected for the app-creation, we can log-in with the service principal using the Azure CLI as follows:
azure telemetry --disable
azure config mode arm
azure login --username "$appId" --service-principal --tenant "$tenantId" --password "$pwd"
Note: Since we want to login in a script that runs automated in the VM to extract the metadata for an application at provisioning-time (in my sample - in the real world this could happen on a regular basis with a cron-job or something similar), we need to make sure to avoid any user prompts. The latest versions of Azure CLI prompt for telemetry data collection on the first call after installation. In an automation script you should always turn this off with the first command (azure telemetry --disable) in your script.
Step #2: A Metadata Extraction Script
Okay, now we have a Service Principal that could be used from backend jobs to extract metadata for the VM in an automated way, e.g. with the Azure CLI. Next we need a script to do exactly that. For my prototpye, I’ve created a shell script (readmeta.sh) that does exactly that. For this prototype I injected this script through the Custom Script Extension for Linux.
Note: Since the SAP HANA One team uses Linux as their primary OS, I just developed the entire prototype with Shell-Scripts for Linux. But fortunately, due to the Bash on Ubuntu on Windows 10, you can also run those from your Windows 10 machine right away (if you have the 2016 Anniversary Update installed).
You can dig into the depths of the entire readmeta.sh-Script if you’re interested. I just extract VM and Networking details in their to show, how to crack the VM UUID and to show, how-to extract related items which are exposed as separate resources in ARM attached to the VM.
Let’s start with first things first: the script requires the Azure Cross Platform CLI installed. On a newly provisioned Azure VM, that’s not there. So the script starts with installing stuff:
sudo mkdir /home/metadata
export HOME=/home/metadata

#
# Install the pre-requisites using apt-get
#

sudo apt-get -y update
sudo apt-get -y install build-essential
sudo apt-get -y install jq

curl -sL https://deb.nodesource.com/setup_4.x | sudo -E bash -
sudo apt-get -y install nodejs

sudo npm install -g azure-cli
Important Note: Since the script will run as a Custom Script extension, it does not have things like a user HOME directory set. To make NodeJS and NPM work, we need a Home-Directory. Therefore I set the HOME to /home/metadata to which I also save all the metadata JSON responses during the script.
The next hard thing was cracking the VM Unqiue ID. This Unique ID is available for some time in Azure and it identifiers a Virtual Machine for its entire lifetime in Azure. That ID changes when you take the VM off from Azure or delete it and re-create it. But as long as you just provision/de-provision or start/shutdown/start the VM, this ID remains the same.
But, the key question is whether you can use that ID to find a VM using ARM REST APIs to read metadata about itself, or even change its settings through Azure Resource Manager REST APIs. Obviously, the answer is yes, otherwise I would not write this post:). But the VM ID presented in responses from Azure Resource Manager REST APIs is different from what you get when reading it inside of the VM out of its asset tags - due to Big Endian bit ordering differences, also documented here.
So in my Bash-script for reading the metadata, I had to convert the VM ID before trying to use it to find my VM through the ARM REST APIs as follows:
#
# Read the VMID from the BIOS asset tag (skip the prefix, i.e. the first 6 characters)
#
vmIdLine=$(sudo dmidecode | grep UUID)
echo "---- VMID ----"
echo $vmIdLine
vmId=${vmIdLine:6:37}
echo "---- VMID ----"
echo $vmId

#
# Now switch the order due to encoding differences between the Windows and Linux World
#
vmIdCorrectParts=${vmId:20}
vmIdPart1=${vmId:0:9}
vmIdPart2=${vmId:10:4}
vmIdPart3=${vmId:15:4}
vmId=${vmIdPart1:7:2}${vmIdPart1:5:2}${vmIdPart1:3:2}${vmIdPart1:1:2}-${vmIdPart2:2:2}${vmIdPart2:0:2}-${vmIdPart3:2:2}${vmIdPart3:0:2}-$vmIdCorrectParts
vmId=${vmId,,}
echo "---- VMID fixed ----"
echo $vmId
That did the trick to get a VM ID which I can use to find my VM through ARM REST APIs, or through the Azure CLI since I am using bash-scripts here:
#
# Login, and don't forget to turn off telemetry to avoid user prompts in an automation script.
#
azure telemetry --disable
azure config mode arm
azure login --username "$appId" --service-principal --tenant "$tenantId" --password "$pwd"

#
# Get the details for the VM and save it
#
vmJson=$(azure vm list --json | jq --arg pVmId "$vmId" 'map(select(.vmId == $pVmId))')
echo $vmJson > /home/metadata/vmmetadatalist.json
echo "---- VM JSON ----"
echo $vmJson
What you see above is, that there’s today (as of August 2016) no way to query Azure Resource Manager REST APIs by using the VM Unique ID. Only attributes such as resource group and VM name can be used. Of course that applies to the Azure CLI, as well. Therefore I retrieve a list of VMs and filter it down using JQ by the VM ID… which fortunately is delivered as an attribute in the JSON response from the ARM REST APIs.
Now we have our first metadata asset, a simple list entry for the VM in which we are runnign with basic attributes. But what if you need more details. The obvious way is to execute an azure vm show --json command to get the full VM-JSON. But even that will not include all details. E.g. lets say you need the public or the private IP address assigned to the VM. What you need to do then is, navigating through relationships between those Azure Resource Manager Assets (the VM and the Network Interface Card resource, in specific). That is where it gets a bit tricky:
#
# Get the detailed VM JSON with relationship attributes (e.g. the NIC identified through its unique Resource ID)
#
vmResGroup=$(echo $vmJson | jq -r '.[0].resourceGroupName')
vmName=$(echo $vmJson | jq -r '.[0].name')
vmDetailedJson=$(azure vm show --json -n "$vmName" -g "$vmResGroup")
echo $vmDetailedJson > /home/metadata/vmmetadatadetails.json

#
# Then get the NIC for the VM through ARM / Azure CLI
#
vmNetworkResourceName=$(echo $vmJson | jq -r '.[0].networkProfile.networkInterfaces[0].id')
netJson=$(azure network nic list -g $vmResGroup --json | jq --arg pVmNetResName "$vmNetworkResourceName" '.[] | select(.id == $pVmNetResName)')
echo $netJson > /home/metadata/vmnetworkdetails.json

#
# The private IP is contained in the previously received NIC config (netJson)
#
netIpConfigsForVm=$(echo $netJson | jq '{ "ipCfgs": .ipConfigurations }')
echo $netIpConfigsForVm > /home/metadata/vmipconfigs.json

#
# But the public IP is a separate resource in ARM, so you need to navigate and execute a further call
#
netIpPublicResourceName=$(echo $netJson | jq -r '.ipConfigurations[0].publicIPAddress.id')
netIpPublicJson=$(azure network public-ip list -g $vmResGroup  --json | jq --arg ipid $netIpPublicResourceName '.[] | select(.id == $ipid)')
echo $netIpPublicJson > /home/metadata/vmipconfigspublicip.json
This should give you enough of the needed concepts to get all sorts of VM Metadata for your own VM using Bash-scripting. If you want to translate this to your Java, .NET, NodeJS or whatsoever code, then you need to look at the management libraries for the respective runtimes/languages.
Step #3: Putting it all together - the ARM template
Finally we need to put this all together! That happens in an ARM template and the parameters this ARM template requests from the user to be entered on provisioning. An ARM-template similar to this could be built for a solution template based Marketplace Offer.
On my GitHub repository for this prototype, the ARM template and its parameters are baked into the files azuredeploy.json and azuredeploy.parameters.json. I won’t go through all details of these templates. The most important aspects are in the parameters-section and in the VM creation section where I hook up the Service Principal with the Script and attach it as a Custom Script Extension. Start with an excerpt of the “parameters”-section of the template:
"parameters": {
    "storageAccountName": {
      "type": "string"
    },
    "dnsNameForPublicIP": {
      "type": "string"
    },
    "adminUserName": {
      "type": "string"
    },
    "adminPassword": {
      "type": "securestring"
    },
    "azureAdTenantId": {
      "type": "string"
    },
    "azureAdAppId": {
      "type": "string"
    },
    "azureAdAppSecret": {
      "type": "securestring"
    },
    ...
  },
...
The important parameters are the azureAdTenantId, azureAdAppId and azureAdAppSecret parameters. Those together form the sign-in details for the Service Principal as it is used in the script described in the previous section to read out the metadata for the VM on provisioning, automatically.
Reading the metadata is initiated through specifying my readmeta.sh-script as a custom script extension for the VM in the ARM template as below:
...
    {
      "type": "Microsoft.Compute/virtualMachines/extensions",
      "name": "[concat(parameters('vmName'),'/writemetadatajson')]",
      "apiVersion": "2015-06-15",
      "location": "[parameters('location')]",
      "dependsOn": [
        "[concat('Microsoft.Compute/virtualMachines/', parameters('vmName'))]"
      ],
      "properties": {
        "publisher": "Microsoft.OSTCExtensions",
        "type": "CustomScriptForLinux",
        "typeHandlerVersion": "1.5",
        "settings": {
          "fileUris": [
            "[concat('https://', parameters('storageAccountName'), '.blob.core.windows.net/customscript/readmeta.sh')]"
          ]
        },
        "protectedSettings": {
          "commandToExecute": "[concat('bash readmeta.sh ', parameters('azureAdTenantId'), ' ', parameters('azureAdAppId'), ' ', parameters('azureAdAppSecret'))]"
        }
      }
    }
...
Since the Azure Linux Custom Script extension prints a lot of diagnostics details about what it is doing, we need to at least make sure that our sensitive data, especially the Service Principal’s password is NOT included in that diagnostics logs to keep it protected (well… as good as possible:)). Therefore the commandToExecute-setting is put into the protectedSettings-section which is NOT disclosed in any diagnostics-logs from the Custom Script Extension.
Important Note: On the Azure Quickstarts Template Gallery are many templates that are using the custom script extension version 1.2. For having the commandToExecute-setting in the protectedSettings-section, you have to use a newer version. For me, the latest version 1.5 at the time of writing the post worked. With the previous versions it just didn’t call the script.
Step #4: Trying it out…
Before you can try things out, there’s one thing you need to prepare: create the storage account and upload the readmeta.sh-script into that account (argh, next time I just write the scripts to clone my GitHub-repository:)). To make it easy, I created a script called deploy.sh with 10 parameters that does everything:
- Create the Resource group
- Create the storage account
- Upload the script to the storage account
- Update the parameters in azuredeploy.parameters.json to reflect your service principal attributes
- Start the deployment with the template and the updated template parameters.
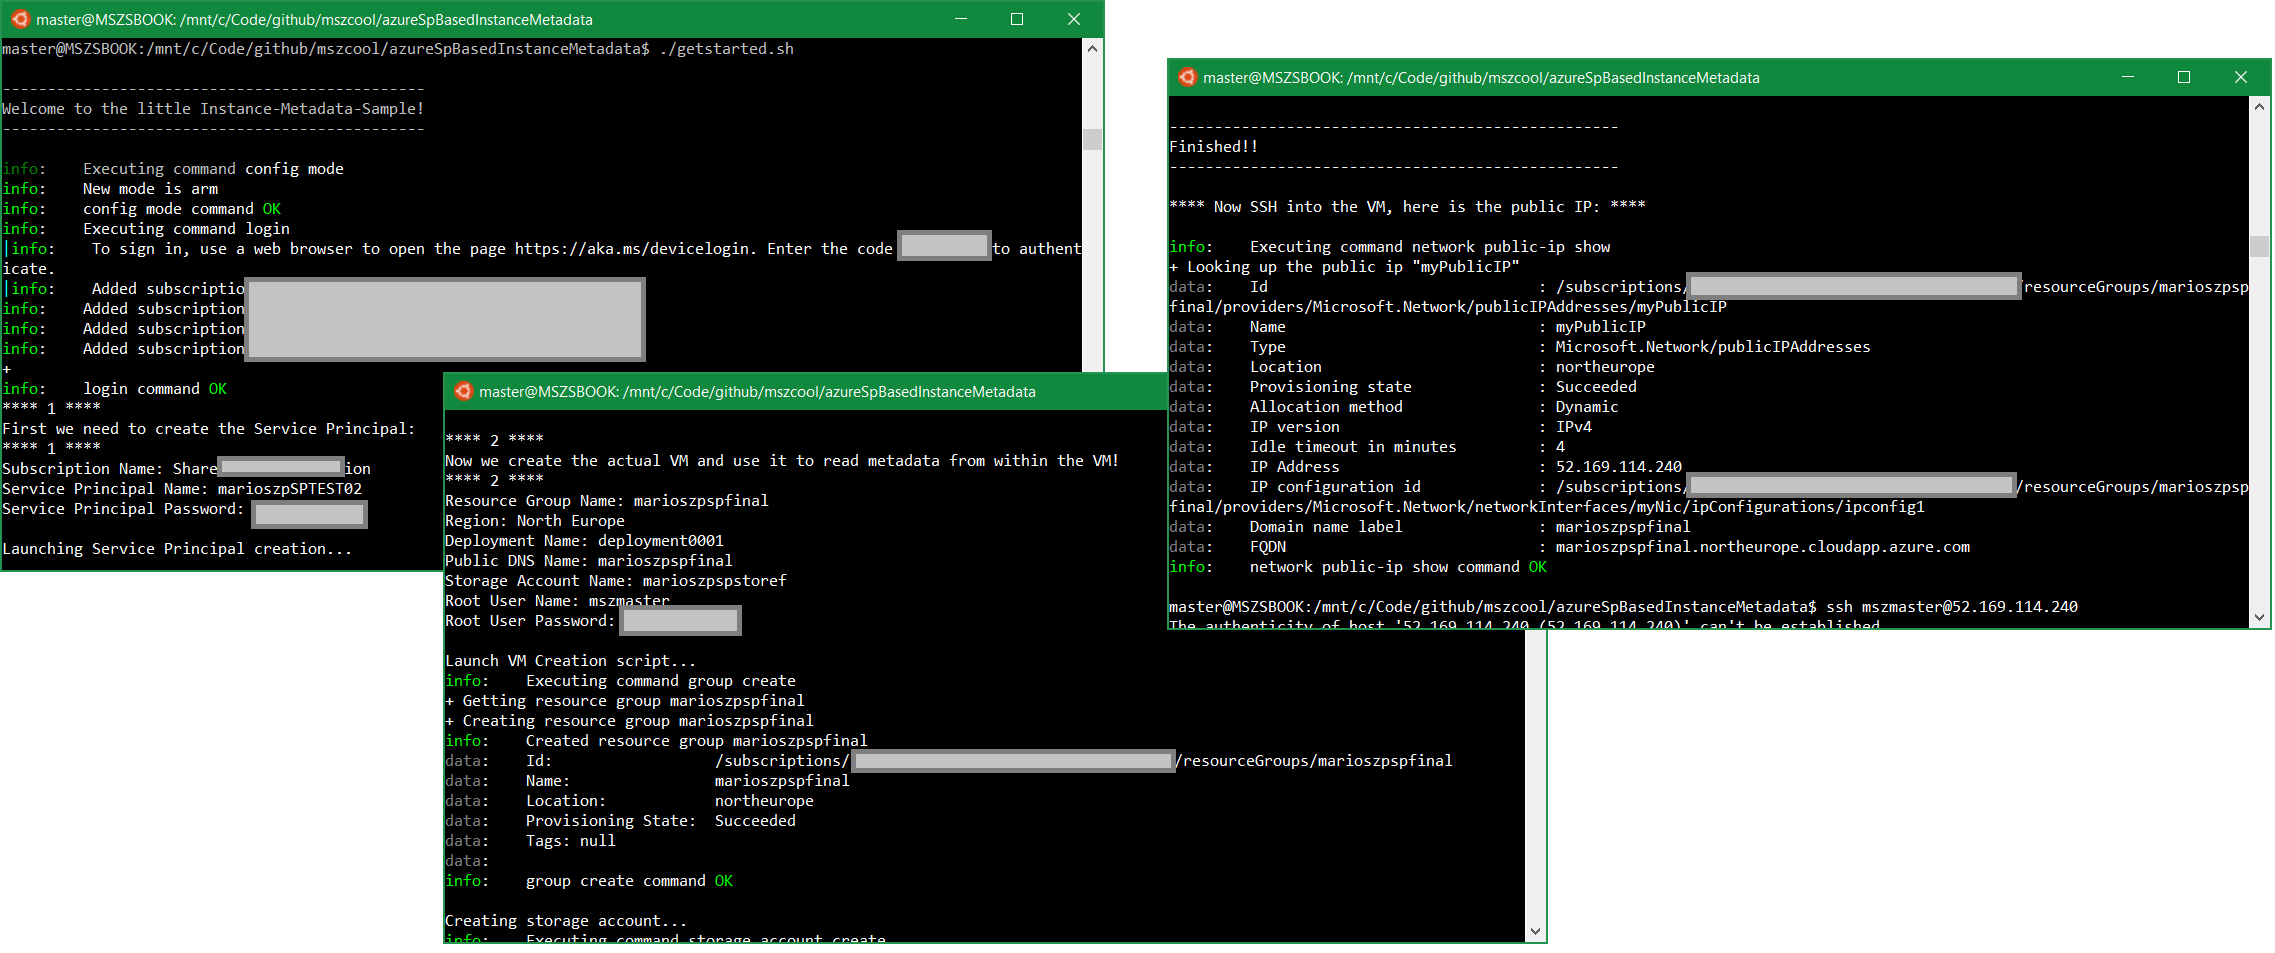
And while trying I thought the 10 parameters make it flexible, but it’s still a hard start if you’d love to just quickly try this. So I created another bash-script called getstarted.sh. That asks you for all the data interactively and calls the createsp.sh and deploy.sh scripts based on the input you interactively entered. Just like below:
Final Words
With this in place, you have a solution that allows you to do both, reading instance metadata of the VM in which your software runs and also (with the right permissions set on the Service Principal) modify aspects of the VM through Azure Resource Manager APIs or Command Line Interfaces.
Sure, this reads like a complex, long thing. It would be much easer for Instance Metadata if you could do it without authentication and Service Principals. All I can say is that this will change and will become easier. But for now, that’s a solution and I hope I provide you with valuable assets that make the story less complex for you to achieve this goal!
And even when we have a simpler solution for instance metadata available in Azure, the content above shows you some advanced scripting concepts of which I hope you can learn from. The coolest thing of it: since Windows 10 Anniversary Update you can run all of the above on both, Windows and Ubuntu Linux, BECAUSE all is written as Bash scripts.
For me the nice side-effect of this was experiencing, how mature the Linux Subsystem for Windows seems to be. What really surprised me is, that I even can run Node Version Manager and build-essential on it (I even tried compiling v5 of my Node.JS version using it and it ran through and works).
Anyways - if you have any questions, reach out to me on Twitter.